Python Virtual Environment Setup and Installation of the Jupyter Notebook.
Table Content
Before jumping into the configuration part, we should know why are we doing this so, lets take a few questions on this.
What is Virtual Environment ?
A virtual environment is created on the top of an existing Python installation, and it is isolated from the packages in the base/main environment.
What is the need of creating virtual environment ?
Suppose one of the projects might require a different version of an library than another. If we have only one place to install packages, then we cannot work with two different versions of the same library. This is one of the most common reasons for the recommendation to use a Python virtual environment.
How to create the Virtual Environment ?
1. Creates a virtual environment named 'virtual_env_new' in the current directory on the local system.
python -m venv virtual_env_new
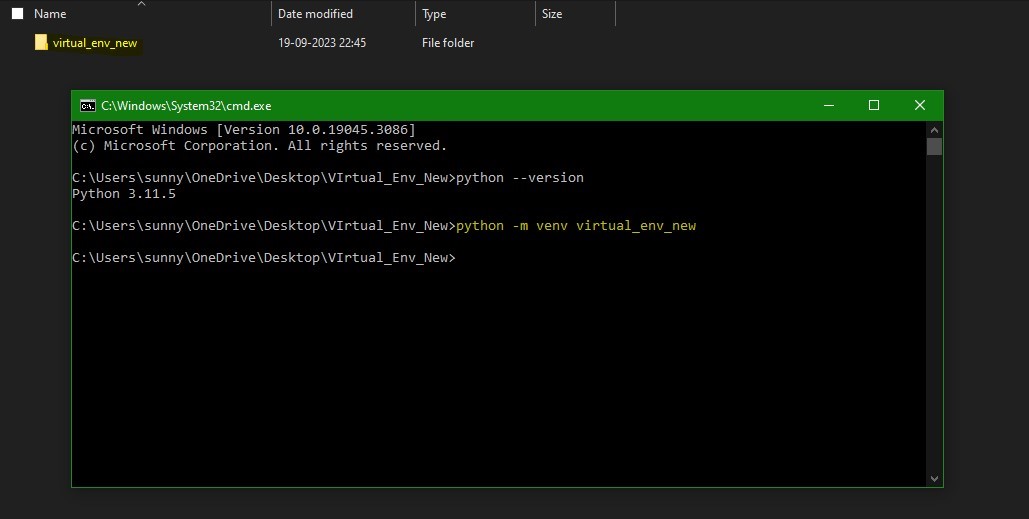
2. Changes the directory to Scripts folder which contains all the activation files to activate the virtual environment.
cd virtual_env_new/Scripts
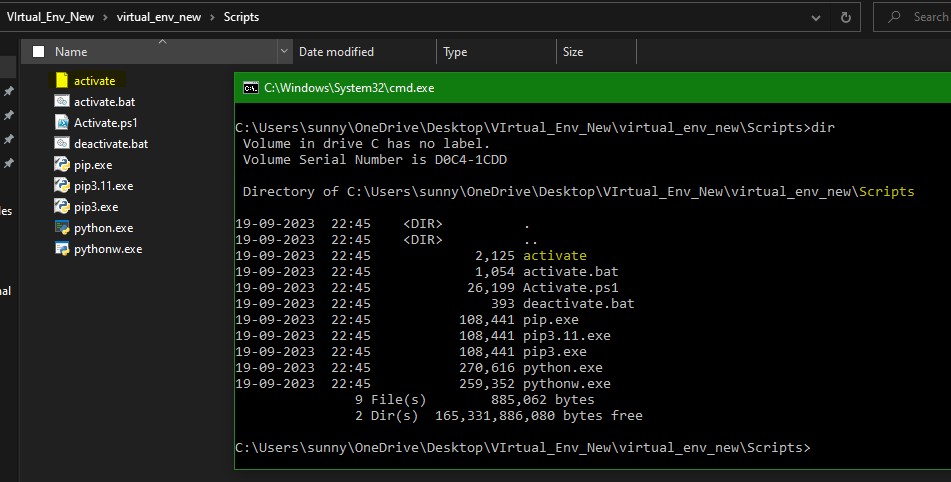
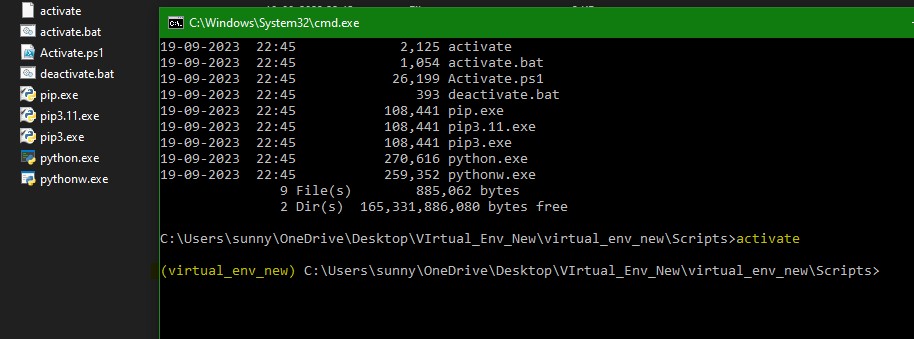
3. The 'activate' command prepares the virtual environment for use.
After activating the virtual environment, you'll see it indicated on the left side within parentheses in the command line interface. Any packages you install will now be contained within this virtual environment, separate from the local system packages.
activate
4. This command will simply update the pip installer to the latest version
python -m pip install --upgrade pip
Virtual environment is created and activated successfully.
Going forward will see how to install the Jupyter Notebook inside the virtual environment.
How to install the jupyter notebook inside the Virtual Environment.
1. This command will install Jupyter Notebook along with all its required modules and dependencies.
pip install notebook
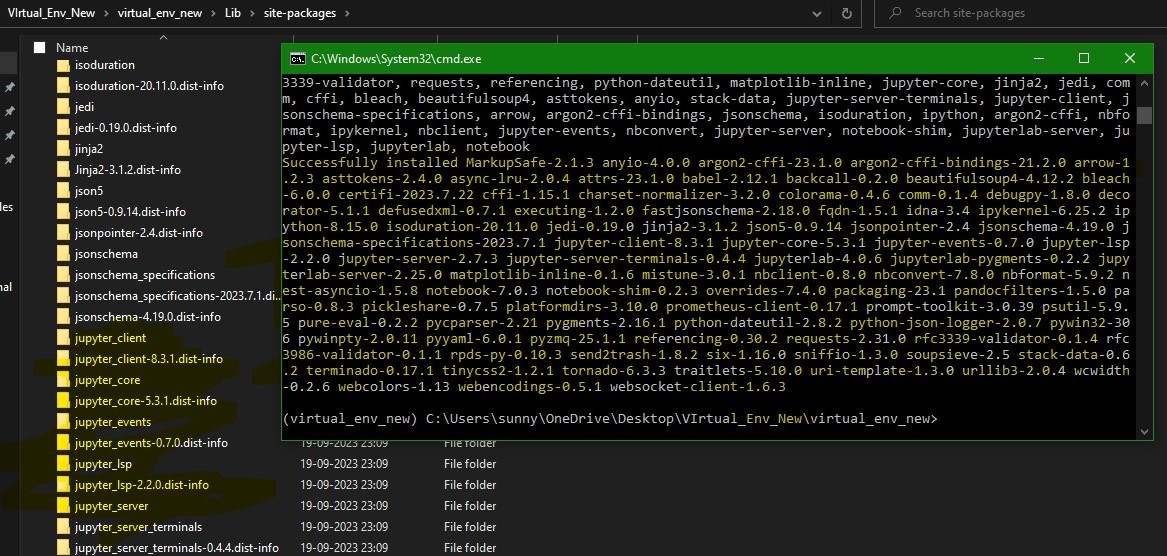
2. Adding virtual environment kernel to jupyter notebook.
python -m ipykernel install --user --name = virtual_env_new

3. It will activate jupyter notebook in the virtual environment.
After executing below command, it will generate a URL that will be accessed on browser to open the jupyter notebook console
jupyter-notebook
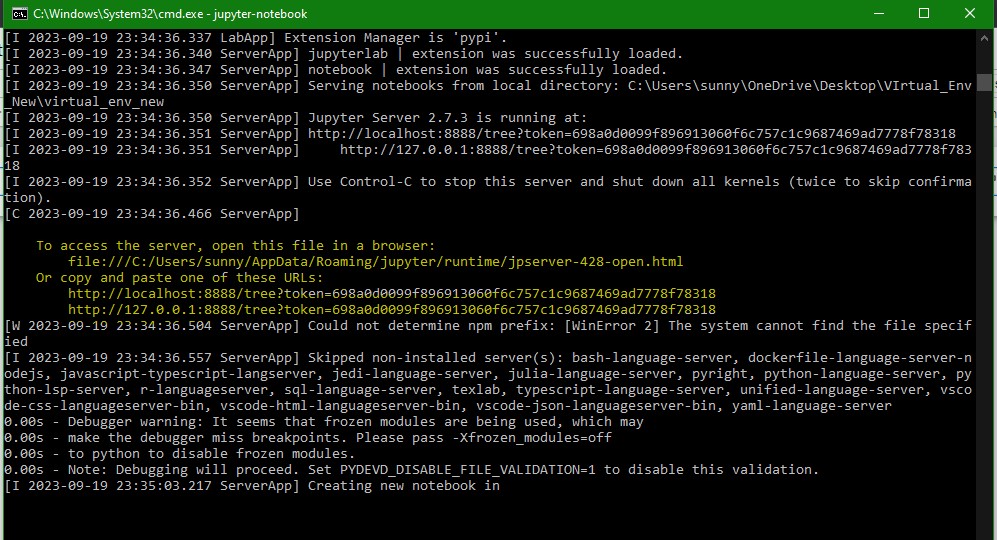
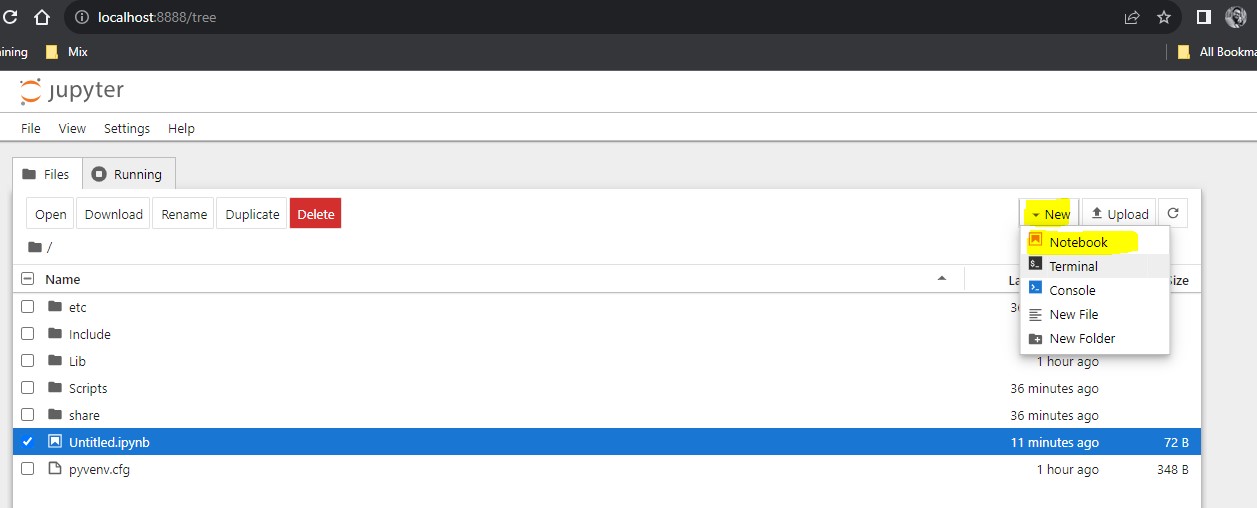
4. After executing the above command, it will redirect to the default browser automatically to open the jupyter notebook console.
Go to New option and select Notebook to open new page/workbook
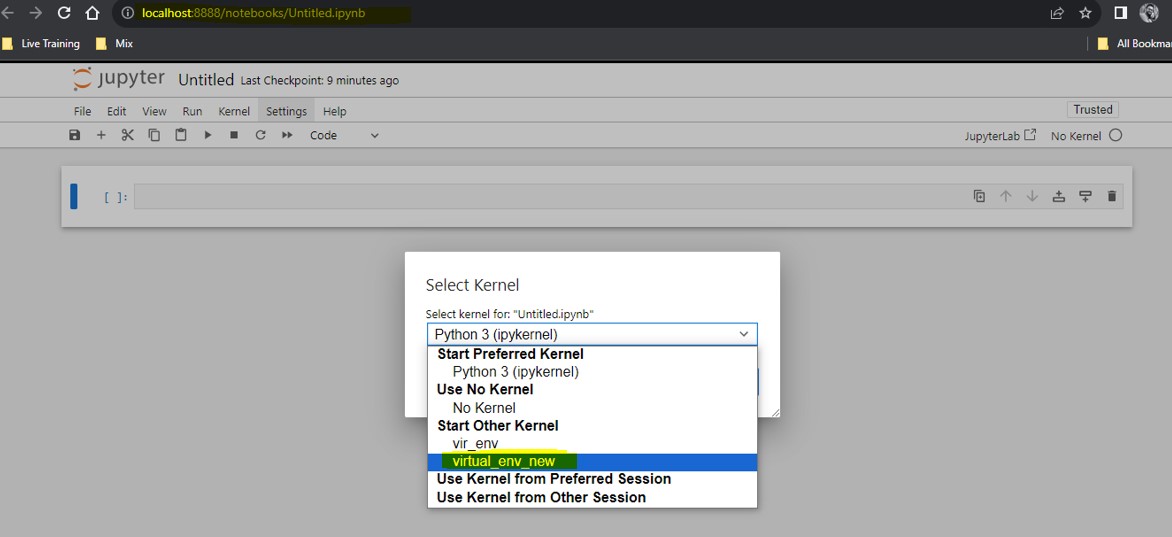
5. After redirecting to new notebook page, go to "No Kernel" and select the created virtual environment kernel (virtual_env_new).
Go to New option and select Notebook to open new page/workbook
6. Now we can start working on the jupyter notebook.
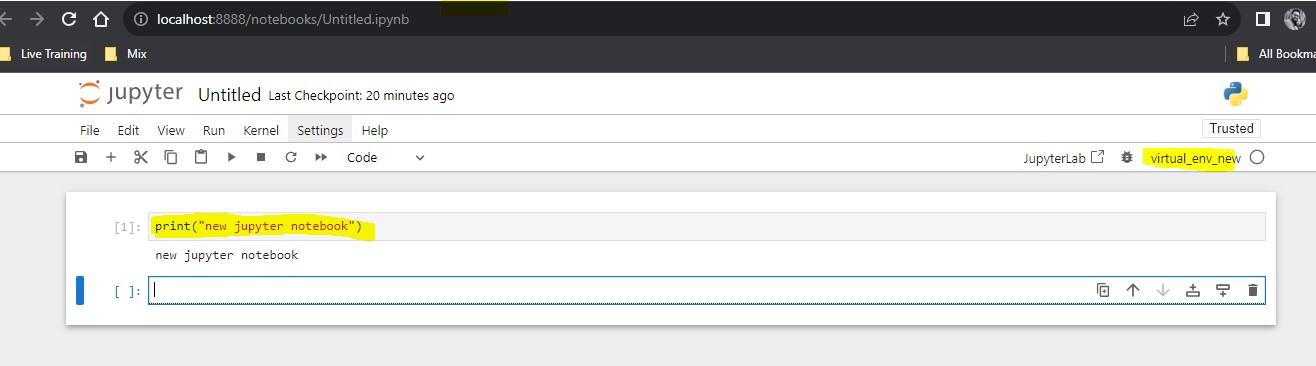
Till now we have seen how to create the virtual environment and activate the jupyter notebook, Now we will see detaching the creted/already-existing kernel from the jupyter notebook.
How to detach the kernel from jupyter notebook.
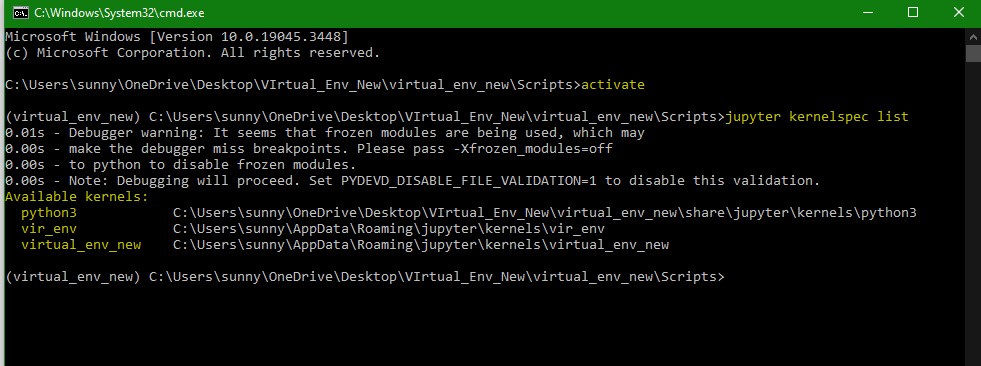
1. Below command will list out all the kernels present in jupyter notebook
Note :- First need to activate the virtual environment where we have installed jupyter notebook.
jupyter kernelspec list
2. it will detach the "virtual_env_new" virtual environment
jupyter kernelspec uninstall virtual_env_new

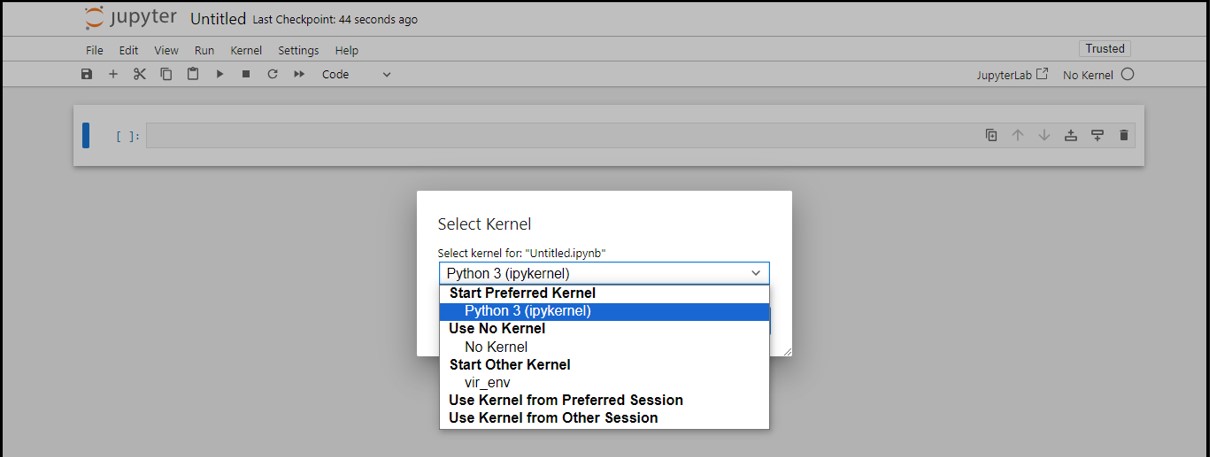
In the Jupyter console window, the deleted "virtual_env_new" is no longer visible.
Thanks for going through this Blog content. I hope it would help you at the time of development activities. I Will keep posting the useful content like this in the future.